Introduction
The Website module allows you to make edits and modifications to your existing website.
How to Edit your Website
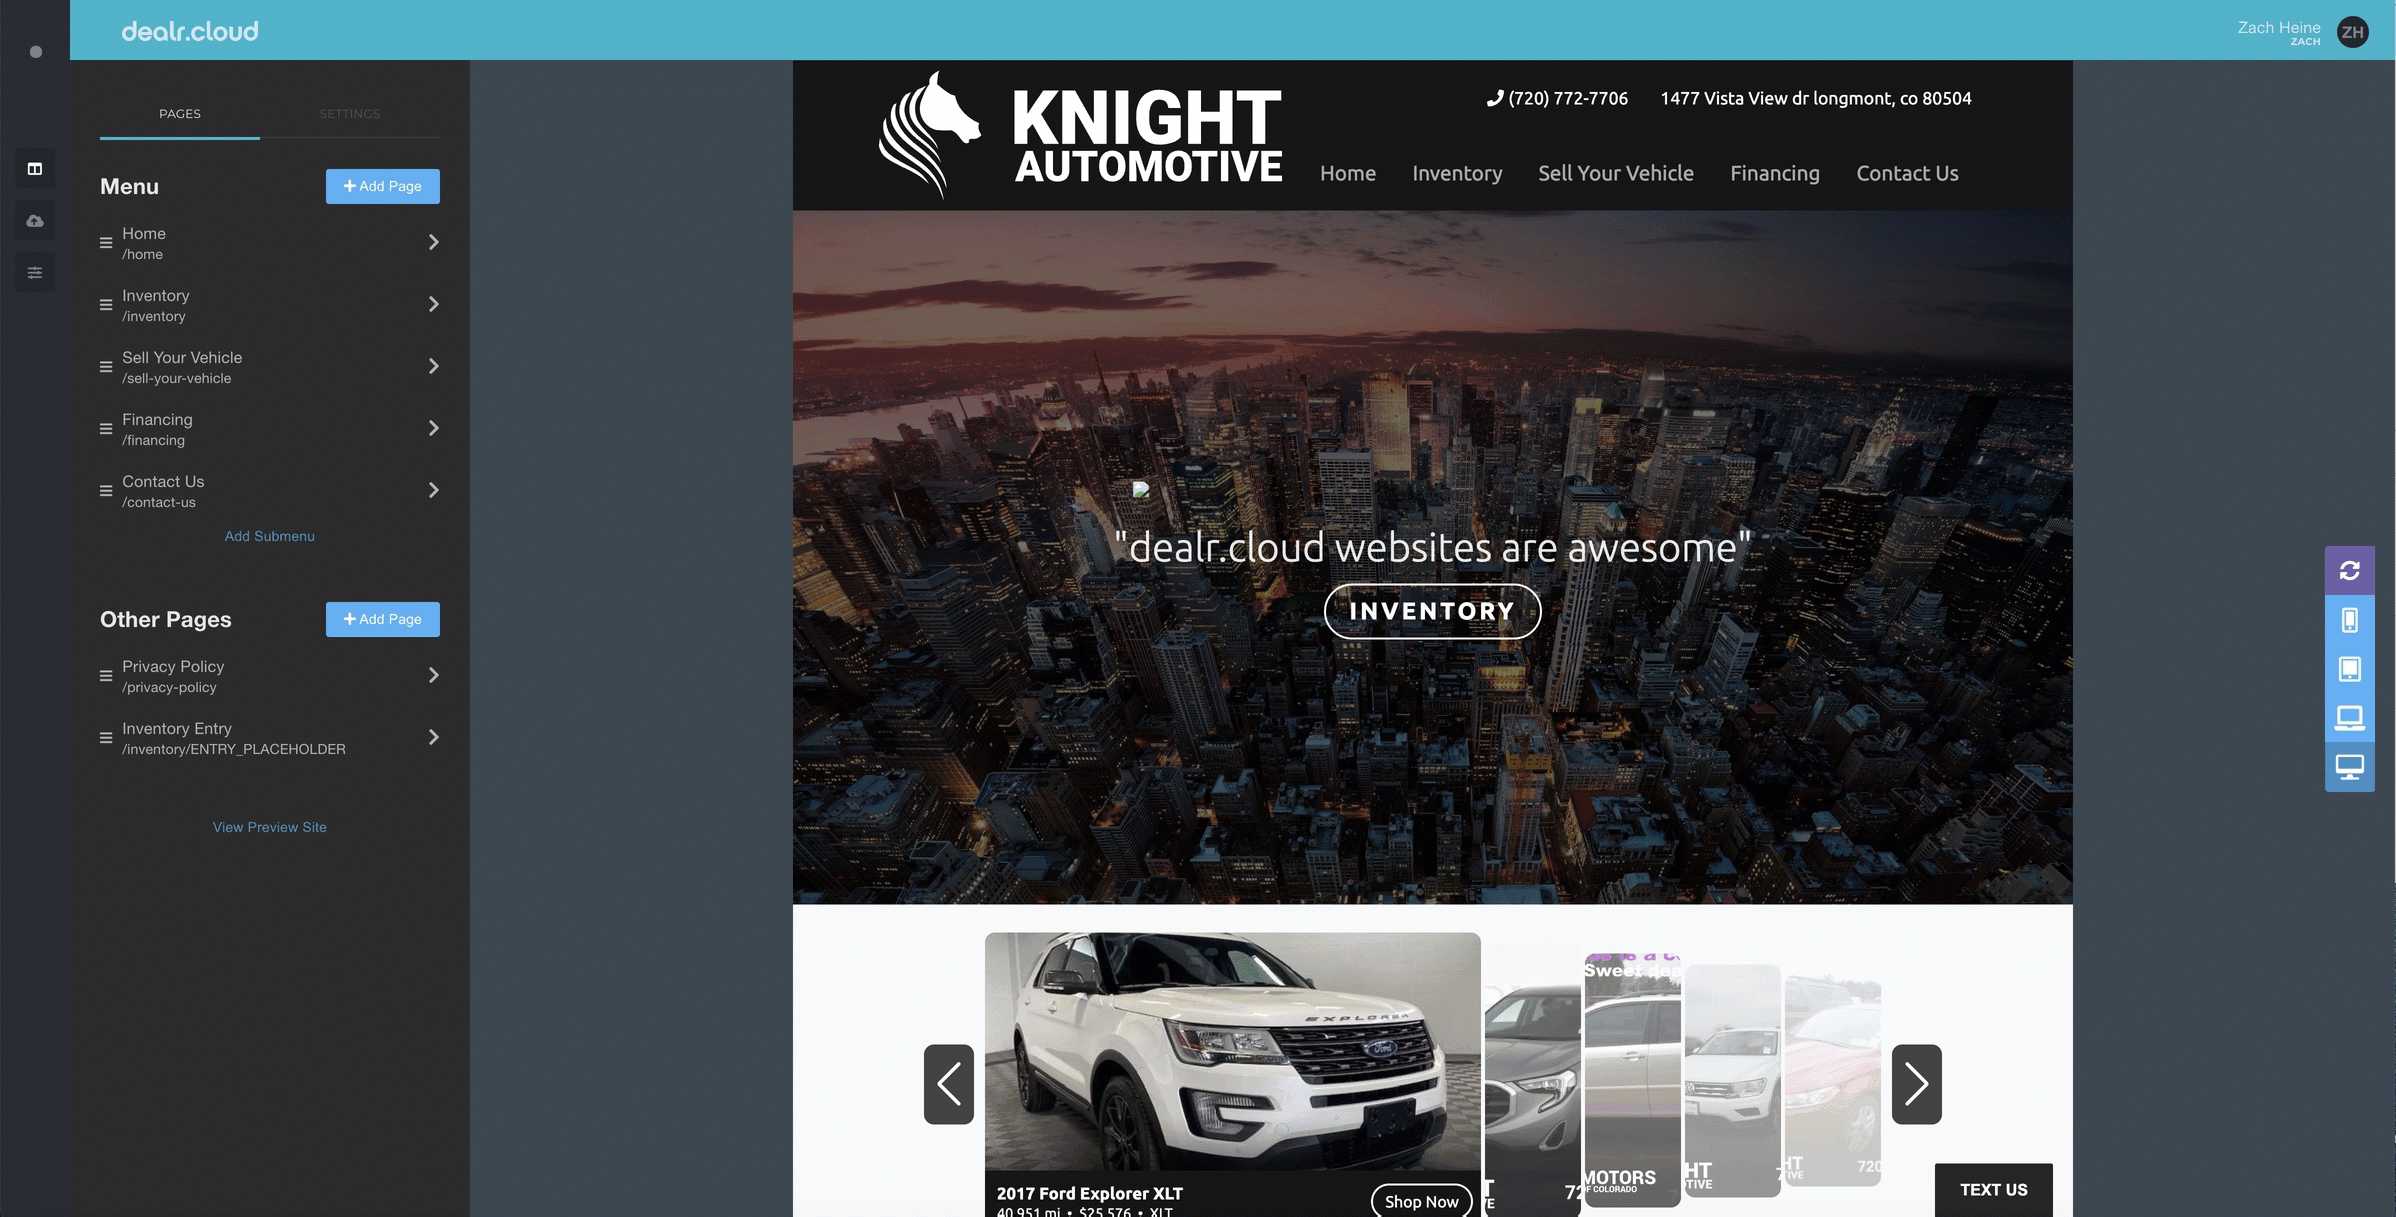
You'll need to access your website editor first. Navigate to Manage > Websites in order to access the website editor.
The website editor is the central interface you'll use to make any modifications or changes to your website. It'll look similar this image, below:


Settings
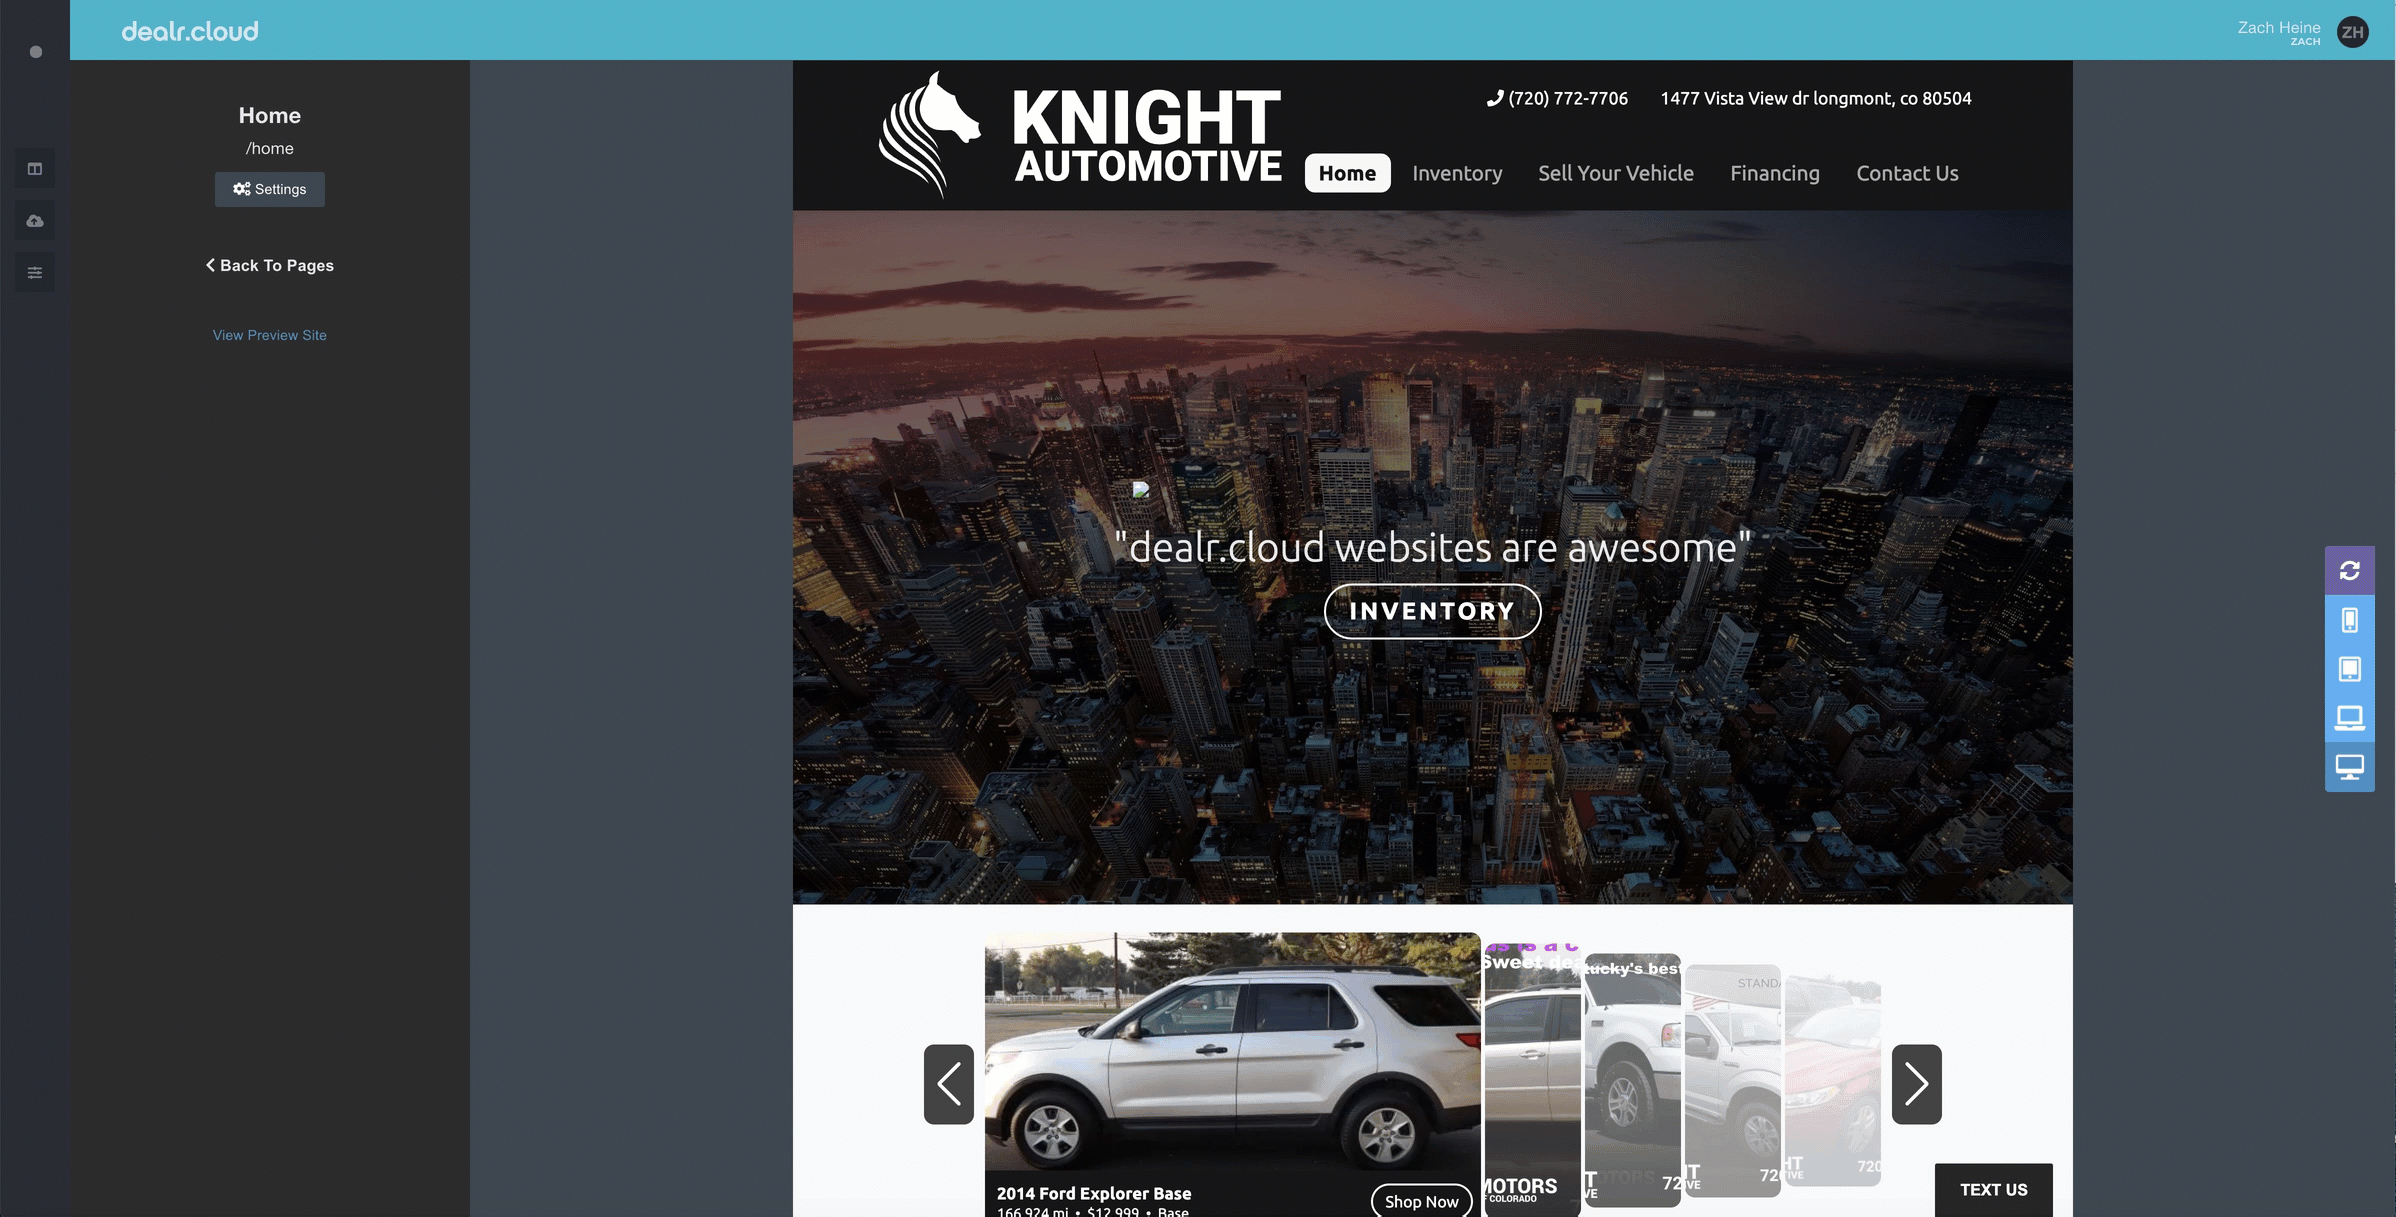
To access your website settings, move the cursor to the left side of the screen until a black toolbar appears. Click on Settings.
The Settings page allows you to edit the Site Name and Hostname as well as adding your Google Place ID and Social Media pages, which will populate as icons in the footer of your website.


If you scroll down, you can also upload your company logo for both Dark or Light website templates.


Adding and Editing Pages
How to Create a Page
To create a page for your website, you'll first need to select the blue button, Add Page, in the toolbar of the editor.


Next, you'll see a Page Settings box appear on the screen. This will allow you to customize the page by adding a Name, SEO Title, and Template.


- This section allows you to add or edit the Page Name as well as insert an SEO Title for the page.
- This section also allows you to select a template for your page. You can search for one of our template pages with the search bar or select whichever one fits your needs best.
How to Edit a Page
To edit an existing page, you'll need to navigate to the editor toolbar and click on the page you wish to edit. Next, you'll select "Settings" and this will open up your "Page Settings."
Here, you can edit the Page's Name, SEO Title, and delete the page as well.
Submenus
Submenus allow you to group webpages under a drop-down menu. This enables you to clear space in your header while organizing pages with a shared commonality.
How to Create a Submenu
You can create a submenu by navigating to the editor toolbar and, at the bottom, selecting the option, Add Submenu.


Selecting this link will then trigger the option to name the submenu and specify a path. Only a title is needed in order to create the submenu.


Once the submenu is created, it'll appear at the bottom of the editor toolbar, like this -


You can then click and drag individual pages and drop them inside the submenu. You can also arrange the submenu to another location in the page sequence in the header.


Blocks
How to Add a Block to your Page
Blocks are the individual components that make up the content of the page. If you need to add any content to the page, you'll need to add a block to the page (or edit an existing one).
To add a block, you'll need to navigate to the page that you want to edit. If you move the cursor onto the page, you'll notice a blue border and plus sign (+) appear. Navigate to the area of the page where you'd like to add a block and then click on the plus sign.
Next, you'll see an Add Block Settings box appear. Here, you'll select one of the pre-designed templates based on the content you need to add.


Once you've selected the template, you'll click "Add" and now that block has been added to the page and is ready for customizing!
How to Edit a Block
Navigate to the block you wish to edit and move your cursor to the left-hand side of the block until you see a purple icon. Hover over it and you'll next see 4 different icons appear. Click on the purple icon to access your Block Settings.


Block Settings allows you to edit the content of your block based on the selected template. Here, you can change the text, upload an image, or modify the link.


Once you're finished editing the block settings, you'll select the "Update" button on the bottom right-hand corner of the screen.
How to Make the Website Edits Live
Navigate to the main black toolbar to the left and click on "Deploys."

Once you're ready to make the edits live on your current website, you'll want to click on the big red button, Deploy to Production.


Deploying to production will make this most recent draft of the website live for your customers to see!
Restoring Previous Website Versions
You also have the ability to restore the website to a previous, older version. This is helpful in the event you want to revert new changes made to the website, or perhaps if you run into a problem inside the website editor.


This feature will revert the website inside the website editor to the last, selected deploy.
To restore a previous website version, navigate to the Deploys page and select the website deploy you'd like to restore the website to. Next, locate the Restore column on the right-hand side of the screen and select the Restore button.
Follow the prompts and this should then restore the website inside the website editor!
Keep in mind, however, that you'll still need to deploy this site to production after restoring it if you want to make this version of the website live.